Yogurt making tutorial
Gentle readers, I thought I would post photos and directions from my last yogurt making session. I started making my own because I eat a lot of yogurt. I found that after a while, I was schlepping too many plastic yogurt tubs to the recycling center. As many know, just cuz we drop stuff off at the recycle center doesn’t mean that all that trash really becomes some other product. In the Reduce, Recycle, Reuse system, one should reduce first. So, that’s why I started making yogurt. It supersuper easy to do! Plus, you will find that your yogurt is very tasty and satisfying made by your own hand.
Below are instructions for making two quarts of yogurt.
First things first. Assemble your ingredients and utensils.
Ingredients:
2 quarts of milk (that’s 8 cups)
1/4 cup yogurt for starter (I used an entire 6 oz container of Dannon plain).
1/3 cup powdered non-fat milk (optional, but recommended)
Utensils:
2+ quart sized pot
large stock pot
thermometer
wire whisk
2 glass quart canning jars with lids and rings.
Heating pad
Bath towel
Directions (with lots of side comments!)

When making yogurt, the most important component is the starter. The starter must be yogurt with live active culture. For this batch I purchased a 6 oz. container of Dannon. You will be able to use your homemade yogurt as starter for up to 5 or 6 batches. But, the culture weakens over time, so it is necessary to purchase a fresh container of yogurt.
Powdered milk: this is actually great stuff to have on hand. I don’t care for drinking the stuff, but it comes in handy for cooking. This box of PM cost a little over $6.00. I reconstitute it for cooking since it is non-fat and cheap. For yogurt making, adding 1/3 cup of PM results in a thicker final product. It can be omitted.
Milk: I use 1% milk to make a low-fat yogurt.
Utensil prep
It is always important to the cleanest possible conditions when making yogurt or canning.
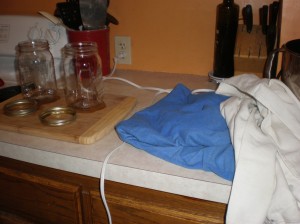
First, place a kitchen towel in the stock pot, then add about 4 cups of water. Place the jars, jar rings, and wire whisk in the pot. Heat the water to boiling and let everything boil for about 5 minutes to sterilize.
A note about containers: some people re-use plastic yogurt tubs, which in theory seems good. However, I am concerned that heating the tubs to sterilize will contaminate the yogurt with toxic chemicals. I use wide mouth “mason” jars. If you want only two jars, look for used jars at thrift shops or garage sales. New jars are not terribly expensive and are useful for other canning projects or to store stuff in the fridge, freezer, or shelves. If you have hard water, you will notice that a white film will cling to the jars. This doesn’t compromise the food. To get rid of the film, soak jars in a vinegar/water solution.
Heat milk: Sterilize your milk pot by boiling a small about of water for 5 minutes. Dump the water out; let cool for a bit. Pour in the 2 quarts of milk and heat on medium until it reaches 185 degrees (F). I use a candy thermometer. Use the wire whisk to stir frequently to avoid scalding the bottom. Heat until the milk reaches 185 degrees. Remove from heat.
Cool the milk: Some people allow the milk to cool on its own. I’m too impatient, so I give the milk a cold water bath. Put the milk pot in the sink and fill it with cold water. Stirring the milk will help cool the milk faster. The milk needs to cool to 110 degrees. The milk can’t be too cold or too hot — otherwise the culture will either be killed (too hot) or not grow (too cold). BTW, I use the cold water for washing up afterward.
Remove milk from cold water bath. Whisk in the powdered milk and mix well to dissolve. Next, add the culture; again whisk well to distribute throughout the milk.
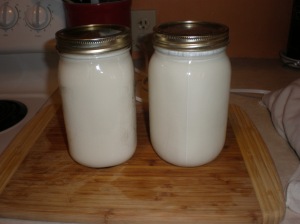
Fill the jars: Pour the prepared milk into the sterilized jars, pop the lids on and screw the rings on. Now it’s time to let your milk turn into yogurt. The process requires that the milk be left undisturbed for around 8 hours in a warm environment. I find that the heating pad method is the easiest.

At least by the time one is middle aged, a heating pad becomes a member of the household. There’s nothing like a heating pad for a sore back after too much gardening or other injury or aches/pains of getting on in years. I remember my mom’s heating pad — it is older than the hills! Unfortunately, they don’t make them like they used to. Today, heating pads have a safety feature: an auto off switch. I guess this is good so that one doesn’t accidentally cause a fire. But it makes yogurt making a little more complicated. Since the yogurt needs a constant warm environment, you have to make sure that your heating pad stays on. So, depending on your pad, you have to “reboot” every so often. Or you can try to find a “vintage” heating pad that doesn’t have this safety feature.
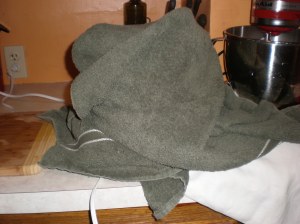
After placing the jars on the heating pad, invert the stock pot (emptied of contents and water) over the jars.
This helps retain the heat. Additionally, cover the whole thing with a bath towel to keep out drafts and retain heat.
Set the heating pad to medium. Now, LEAVE IT ALONE!! Resist the temptation to check under the pot for at least 8 hours. Moving the jars can disrupt the coagulation process leaving a runny yogurt. I usually leave the jars to culture for 10 hours as this results in a more tangy yogurt. Once the yogurt has set the jars can go into the fridge over night. The cooling process will develop the flavor further. In the morning you will open your jars to find a beautiful white substance that tastes wonderful!
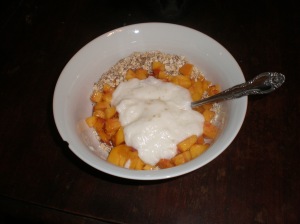
Above is a photo of my morning breakfast. This is a great way to use your homemade yogurt and get a hefty dose of fiber. I can’t stand hot oatmeal so I eat it cold.
Recipe: 1/2 cup quick oats
2 TB flax meal
1 TB sugar
1/2 cup yogurt
Fruit of choice (a diced Missouri peach is shown)
Mix everything together and let sit for a couple of minutes to soften up the oats. Enjoy!
Well, hope this tutorial is helpful. The process of making yogurt is really easy and quick — well worth the effort. Not only will you savor something made by your own hands, you will save money (ingredients cost around $3.00 compared to >$6.00 for two tubs of yogurt), and you will reduce your plastic consumption.


August 21, 2010 at 5:43 pm
I am going to try this. But I will use whole raw milk. We dearly love whole milk yogurt with cream on the top. I don’t know whether the cream will sort out, do you? I guess this will make the dry milk unnecessary? I’ll let you know what happens. Glad I ran across your blog.
bruce
August 21, 2010 at 6:16 pm
I haven’t tried whole, raw milk. I think you can leave out the powdered milk with whole milk since there’s more fat & proteins. Good Luck and let me know!
August 21, 2010 at 8:31 pm
This sounds great Carleen. I don’t eat much yogurt and when I do, I usually eat Stonybrook Chocolate on the bottom. So, the homemade is better tasting than purchased in store yogurt? joan
August 27, 2010 at 1:17 pm
hmmmm, I think that Stonybrook choc at the bottom will taste better than homemade plain anyday!!! 😀
August 24, 2010 at 10:05 pm
Hey! That’s my heating pat!
August 26, 2010 at 7:58 pm
Well, we’ll see. Of course I don’t follow directions well. I also had no candy thermometer that I could find. Used a meat thermometer and just judgment, after looking at recipe in Syrian cookbook. It is hot out today so I simply am putting the dark colored pot with yogurt inside out in the sun. Maybe this won’t be hot enough. I also used full fat milk. Let you know if it is any good.
August 27, 2010 at 1:18 pm
Meat therm works just fine. Let me know how the sitting in the sun process worked! Now that’s the real old fashioned way of doing it!
August 27, 2010 at 2:59 pm
Tastes great. Left in the very hot sun inside the black large stockpot starting with the hot wet towel and a bit of the hot water. I think it is better than the Brown Cow I used for starter. I used full fat, raw milk, unpasteurized (we all have to die sometime and Marilee is a raw milk addict). It has the cream on the top as I hoped it would. I imagine that this is because of the fact that the milk was not homogenized but it could be a characteristic of the starter. Thanks for the encouragement. My only problem now is that I have too much yogurt since I started with two quarts in the frig. and now have two quarts more. Guess I’ll have to get some lamb and cook it in the yogurt. I am eating big bowls of the old stuff with berries in the mornings to get rid of it.
September 19, 2010 at 7:48 pm
So it all worked out well. Yogurt all gone. After a bit of research I think the cream on top (lots of fat for the fat old man) would be better if I made it with at least some cream. Saw a recipe that called for using only half and half and one person that seemed to make it with only cream. Wonder if my use of raw milk is vitiated by heating to 180 degrees. I also saw one place that said the person never heated it above 110. I guess above 160 pasteurizes my milk. I’m not sure I want to go so far as to try without heating that high but I might try it. Marilee is a whole milk freak. She thinks if is essential to good health because it encourages a good gut bacteria colony that helps fight other bacteria. I resisted drinking the raw mild for some time but damned it is good, especially since it is not homogenized either. I think this is what milk used to be. I is almost as good as the pastured eggs I get at the farmer’s market. After all, my family lived on a small mostly subsistence farm during the depression and we all lived. I remember milking the cows even though we moved to the big city (all of 30,000 people) when I was three.
September 20, 2010 at 12:36 am
The “cream” on top is whey . . . it may be thicker using cream, but won’t be like cream from fresh milk. Your parents put you to milk at the age of 3??? That would be child abuse today!
September 21, 2010 at 10:11 pm
I think the whey is much more like water. What is on top of mine but more so on Brown Cow is much thicker than the yogurt itself. I’ll let you know what happens when I include some cream. btw: lots of recipes talk about straining it off to make “yogurt cheese” which I think is called labne or something like that in Lebanon. I always thought that Little Miss Muffet was eating cottage cheese that was kind of wet when she sat on her tuffett.
November 7, 2010 at 12:21 am
This is nearly the simplest process I have seen published, but it can be made simpler, as I explain below. I believe to be a sustainable practice, it must be simple and quick.
I am a great fan of Albert Enstein’s , “things should be as simple as they can be but not simpler”
I have been making yoghurt for about three years, since being inspired by a Kenyan’s story about his grandfathers yoghurt plant; a earthenware jar in the corner of his hut on the slopes of Mt Kiliminjaro. He ran a small mob of milking sheep which ate the weeds he pulled from his beans, corn and bananas. What he did not drink he threw in the yoghurt jar.
I now use a “Esiyo” yoghurt maker $20 from Kmart Aust.
It is a 1 liter polythene flask that fits into a larger 2L insulated container that contains a body of boiling water 2L. I half fill the flask with cold tap water, as a teaspoon of yoghurt, shake, fill the rest with powdered milk of choice, mix by placing a fork through the powder, stirring from the bottom side till dissolved, shake again until all lumps dissolve, top up with water, shake again and place in the insulated jar.
This jar works much better than earlier jars as the volume of boiling water is sufficient to bring tap water to optimum fermentation temperature.Takes 6 hrs in the tropics, 8 hrs in temperate climates. All sorts of variations are possible depending on taste and nutritional requirements; from using full cream powder, organic full cream whole milk instead of water, even adding cream.
I use skim to keep my calorie budget balanced, as a vegetarian I use it with oats in the morning, with kebabs for lunch and often as a yoghurt drink before dinner and also added in the last minute of cooking curries.
I cannot recommend the yoghurt drink highly enough; it is an ideal balance to inflammatory foods such as carbohydrates and sugars, for sufferers of digestive disorders. It is a snack in its own right, killing hunger pangs immediately. It can be made less bitter by adding Stevia and if you want variation from the natural lemon flavour add vanilla essence or fruit flavouring.
This is all stuff the peddlers of toxic beverages such as alcohol and soft drinks don’t want us to know. They have no interest in our health or longevity.
cheers Duncan
February 17, 2011 at 12:45 am
This time I am making really raw milk yogurt. I simply added about a half a pint of raw cream and 1/4 cup yogurt to a sterilized glass jar which I heated by submerging it in water a little over 110 degrees until the mixture was at that temperature. It is now submerged in water of the same temperature inside a styrofoam cooler. I will report back on how it is if the raw milk doesn’t kill me. You can check out my progress on my blog at: